Every year our school does an Art Walk to showcase the kids art projects. Never one to pass up a fundraising opportunity, they also hold a chair auction. Each classroom is supposed to decorate a chair in the theme of their choosing and then there is a silent auction for the chairs. I ended up volunteering to do the chair for my daughter’s first grade class. I haven’t redone very much furniture, but I felt like I could handle it. The teacher was so sweet and pretty much gave me full creative control. I think she was just so happy to have a volunteer. Plus, it’s cupcakes and everyone loves cupcakes. Especially when it has a cute saying like, “Life is as cute as a cupcake.”
Here’s a little Before/After action and then I’ll tell you a little more about the process.
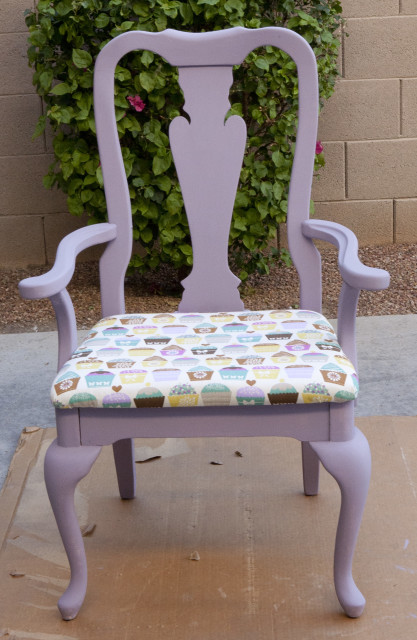
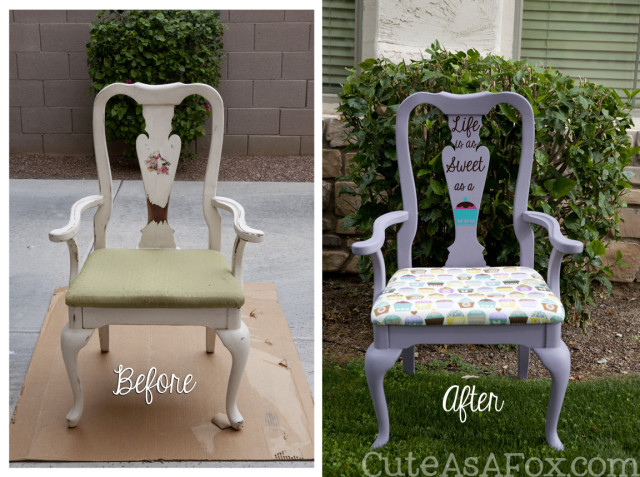 I was very happy with how it turned out. Who wouldn’t love a pretty cupcake chair? In fact, I didn’t really want to let it go once it was all done. I may have even bid on it at the auction. 😉
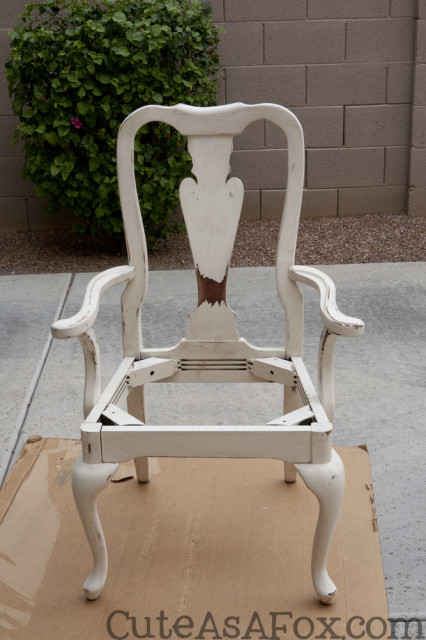
Prep – Let’s break it down a little bit. Laura, Pink Cake Plate, was so kind to donate a chair that she had used in her wedding. She had shabby chic’d it for the wedding but she wasn’t using it anymore. I love the shape and I think it has so much character. I was using chalk paint which doesn’t need any prep but I did clean it pretty good and I lightly sanded off a flower decal. There were four screws on the underside of the chair holding on the seat, so I removed those and set aside.
Paint – The next step was to paint it with Annie Sloan Chalk Paint in Emile. I went with the Annie Sloan because they sell it a local store called Green Table Gifts. I have never used chalk paint before and the ladies at Green Table Gifts are experts. They are so kind and they are so willing to answer questions and give tips. You can find chalk paint that costs less, but the Annie Sloan Chalk Paint was totally worth the money in my opinion.
Wax – After the paint had set for 24 hrs, I used the Annie Sloan clear wax to seal the chair. Unless you want a chalkboard, you need to apply the wax. I brushed it on and then polished it off with cheese cloth. The ladies at Green Table Gifts highly recommended the cheese cloth and it worked great. While the paint was drying, my sister was kind enough to recover the cushion for me. We just laid the cushion on top of the cupcake fabric and started stapling with a staple gun. We started by stapling in the center top and bottom to make sure everything was straight and then we went around and secured everything.


Leave a Reply