I saw some blanket lollipops at an online boutique and knew I could make them. Here we go with my very first tutorial. (Please ask questions if you don’t understand a step!)
Don’t forget to check out the Washcloth candy rolls in part 2 of the series!
Here is what you need: 1. Receiving blanket, mine is 24″x 28″ but I’ve seen 30″x30″ at the dollar store.
2. 1 Dowel – I spray painted mine white
3. Shrink Wrap – I cut up a Shrink Wrap back from the dollar store. Cellophane would be just fine too
4. Scotch Tape – The invisible kind
5. Flexible Garden Tie – I found mine last year in the Dollar Spot at Target, I bet you could find it in any gardening section
6. Ribbon
7. Glue Gun/Glue
Step 1. Lay out your receiving blanket with the back/boring side facing up.
 Step 2. Fold the blanket in half, using a hot dog fold. (Doesn’t matter if it is a square I suppose)
Step 3. Fold the bottom third, that has the open edges, up one third of the way. Step 4. Fold down the top, one third of the way. The open edges are now hidden inside and will give you a cleaner look.
 Step 5. At one end, start rolling like you would a sleeping bag. TIP: Don’t roll too tightly or it looks a bit too flat with weird creases everywhere.
Here is what it looks like all rolled. This is a view of the front. If you look at the back, there will be an extra set of lines from where you folded it in thirds. Step 6. Using your invisible scotch tape, tape around the entire roll in the very center of the roll. This will serve to keep the roll together AND give a place to attach the dowel to.
 Step 7. Prepare your Garden Tie. I cut two pieces approximately 14″ and 12″. I spray painted it white. It wasn’t the most successful, but as a few inches of the tie will show, you probably want it something other than green.
 Step 8. Fold one end of your 14″ tie in about 3″.
 Step 9. Insert the tie into the back of the middle of your roll. Push it all the way in. If you can see it sticking out through the front, then make your fold over a little smaller so it stays hidden.
 Step 10. Curve the tie around the back of your roll and fold it over until it goes to the center of your scotch tape.
 Here is the shape the garden tie should be in, if I haven’t been clear.
 11. Wrap the remaining tie around your dowel several times. (Sorry for the blurry picture)
 You can see the green coming through, it doesn’t matter, as it will be covered by ribbon later.
 12. Here is where it gets shocking! Put a dab of hot glue on the center of your tape to attach the dowel. I tested hot glue on my tape before hand, I suggest you do the same. I also actually tried putting the glue directly on the flannel. It came off without damage to the blanket, but the tape seemed less risky.
 13. Make sure the dowel is as centered and upright as possible.
14. Once your hot glue is set, wrap your lollipop in shrink wrap or cellophane. I wanted to be sure I had enough since shrink wrap does after all shrink. You can get 2-3 lollipops worth of cellophane out of one of those bags from the dollar store. Here’s an after shot of the shrink wrap. Careful not to burn your hands, but you also have to be careful not to blow dry the “wrapper” that hangs down. Mine I love shrink wrap!
 15. Take your 12″ piece of tie and wrap it around the base of the lollipop on the outside of the shrink wrap. This holds everything in place and helps stabilize your lollipop.
 16. Tie a ribbon around to hide the garden tie and trim any excess shrink wrap. I actually trimmed quite a bit more after I took this picture.
That’s it, you’re done!!
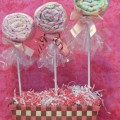
I made three, stuck them in a Dollar Tree basket, with dollar tree styrofoam and some Dollar Tree basket “grass.” One final note: you can probably skip most of the steps and just put a dowel at the back of the blanket roll, shrink wrap it. and call it a day. I did that at first, but everyone I showed it to seemed disappointed it didn’t look like a “real” lollipop with the stick in the center.
Stay tuned for other tutorials including washcloth candies and burp rag cupcakes!
If you made it all the way down here, Thanks! This was my first attempt at a real and complete tutorial. I’d love some feedback. I’d also love to know if you try it out!


What an ADORABLE idea!! Very thorough tutorial. This would make a great baby gift!! Thanks for the idea!
How cute!! This is be a unique baby gift and could be used with the candies you mentioned as decorations for the shower before the happy momma takes them home! Your tutorial is vey is very thorough and easy to follow.
OH MY GOODNESS
Brilliant!
baby shower anyone?
This is way to cute. I love it. I’m going to bookmark this one!!!
Thanks for joining Get Your Craft on Thurs. Please join me next week for another great party.
Lori
Smart, smart, smart and cute, cute, cute!! GREAT gift idea for new babies!!
Thank you for sharing and thank you for all of the wonderful step by steps so I can hopefully give this a try!!
I found you via Me and My Bucket!! Thanks for linking up!!
VERY cute! Thanks for the tute!
miamoodesigns.blogspot.com
Lovely! And so well explained too – all three of the series.
Cool! I love this idea!! Thanks for the tutorial. It was easy to follow…..can’t wait to see the other goodies!!
That is so cute! What an adorable gift!
Thanks so much for linking up to my party! I really appreciate it!
XOXO
Jen
This is fabulous! I am going to a baby shower soon and was looking for a way to present all the things I made/bought. Any idea how to make the onesie rosebuds?
This is so cute, it is giving me ideas. I wonder how this would work with onesies?
Amy T
Great tutorial! And cute idea to decorate the present:)
Great job on your tutorial! Love the idea…perfect for the baby shower that I don’t have a present for this weekend. Thanks!
So cute! I just found the gift for my neighbor’s baby shower!
VERY VERY cute!!
I’m bookmarking this for the next baby on my list! This is super cute! Great job on your first tute!
All of your ‘candy’ baby ideas are absolutely adorable!! I just LOVE them! I’m due in June, and I want to just make a bunch just for me, they’re so stinkin’ cute!!! Thanks!
What a wonderful baby gift for a shower great blog wonderful tutorial.
Thank you for sharing with us all.
I featured the whole set of these and gave you an award at my blog!!!!
These are super cute! I have made lollies out of lots of things but this is new! Thanks for sharing!
Thanks for linking up to my Everything Nice Baby Girl Link Party!
madincrafts.blogspot.com
I love all you did – miracle babies products are gorgeous! I also wanted to let you know I blogged about miracle babies baby gifts. We love our miracle babies! Here’s a $5 off coupon from My Miracle Baby.com to celebrate! $5 off your purchase of $30 or more.Use coupon code: COUPON05.
I gave you a shout out on my blog:) I made a baby shower basket using these ideas, and it was such a hit! Thanks!!
Many types of Baby Gifts are available and each of them will make the baby’s family equally happy. If you want to go with a traditional one then a personalized baby basket will be perfect. These baskets are filled with gifts and necessary items for the baby. You can personalize such a basket by simply adding or replacing some of the items.
Hi that so creative please have more tutorials.
LOVE this idea! Thanks for providing the inexpensive solution to a show stopper of a gift!
Just found these! Have a baby shower this weekend and plan to do a basket of these + the bon bon ones. She’s not doing a gift opening but would make a great display! THANKS!
I am leaving little “secret” gifts each week for my cousin who is expecting her first child and i think this week be one of the next week’s gifts! She has no clue who’s doing it and I’m loving it!
I couldn’t find a tutorial online for a blanket like this. It’s a really fun, creating and molding ideas on blankets in gifterrific presentation ideas!
Julia
Choofie – Onwer
baby blanket
great tutorial, love